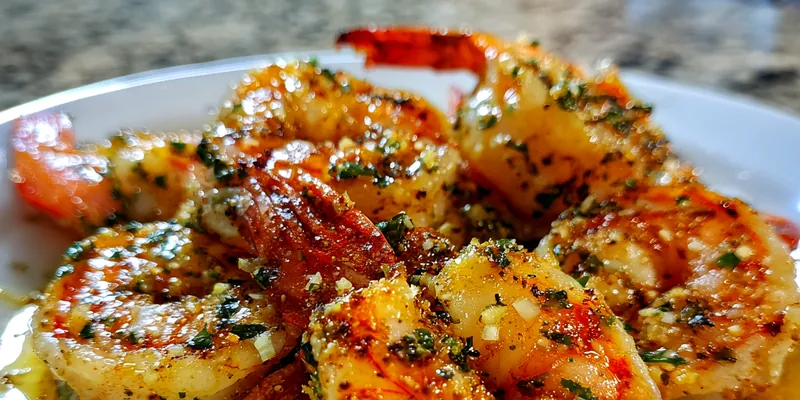
Crispy Garlic Butter Shrimp
Crispy Garlic Butter Shrimp is a mouthwatering dish that combines succulent shrimp with a rich garlic butter sauce. The contrast of the crispy coating and the buttery, garlicky flavor makes this dish irresistible. Originating from coastal kitchens, this recipe is perfect for both weeknight dinners and special occasions. Serve it over rice or alongside a crisp salad for a well-rounded meal. What makes this dish truly special is the balance of flavors and textures that come together in every bite.

Why This Crispy Garlic Butter Shrimp Works
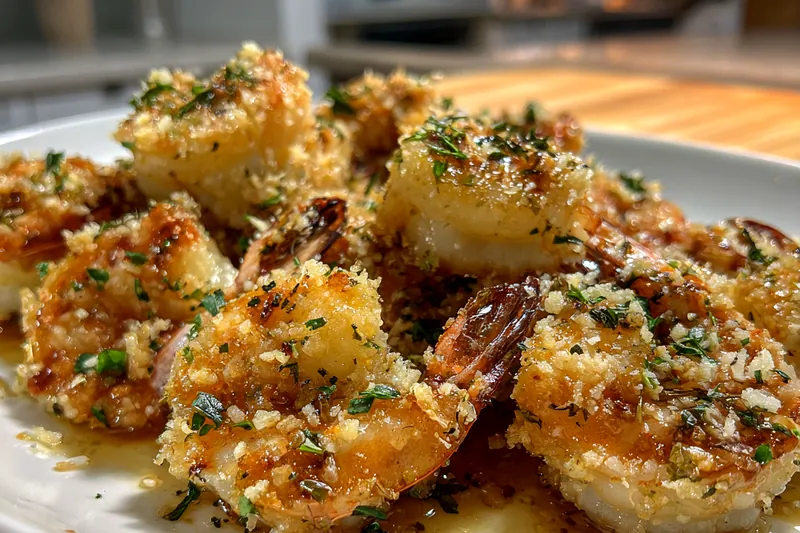
The technique of breading the shrimp before frying creates a delightful contrast of textures. The flour helps to absorb moisture, while the egg binds the breadcrumbs, resulting in a crunchy coating. The key to achieving the perfect crispiness is ensuring that the oil is hot enough before adding the shrimp. This allows for an immediate sear, sealing in the juices and flavor of the shrimp within.
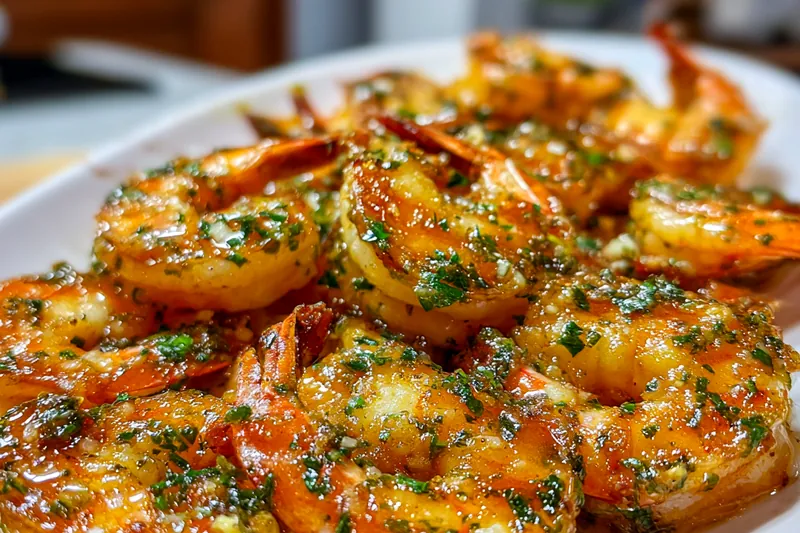
What makes this dish special is its simplicity and the depth of flavor that comes from the garlic butter sauce. The use of fresh ingredients, such as garlic and parsley, elevates the dish and adds aromatic qualities. Additionally, the combination of spices like paprika and cayenne pepper provides a subtle kick that enhances the shrimp's natural sweetness. Each bite is a perfect harmony of savory and buttery flavors.
💡 Professional Tip
For the best results, ensure your shrimp are dry before breading to achieve the crispiest coating. If you're short on time, you can skip the breading and simply sauté the shrimp in the garlic butter for a quick, flavorful dish. However, the breading adds a satisfying crunch that elevates the experience. Don't be afraid to experiment with your favorite spices to make this dish your own!
Frequently Asked Questions
Yes, you can prepare the shrimp ahead of time by breading them and storing them in the refrigerator until you’re ready to fry. However, it's best to fry them just before serving to maintain their crispy texture. You can also prepare the garlic butter sauce in advance and reheat it when you're ready to combine. This makes it easy to whip up a delicious meal in no time.
If you're looking for substitutions, feel free to use chicken or tofu instead of shrimp for a different protein option. For the breadcrumbs, panko can be used for extra crunch. If you're sensitive to spice, you can reduce or omit the cayenne pepper. Additionally, using ghee instead of butter can add a unique flavor twist while keeping it dairy-free.
The shrimp are done when they turn a vibrant pink and are opaque throughout. Cooking time is usually about 2-3 minutes per side, depending on their size. It's essential not to overcook the shrimp, as they can become rubbery. Using a meat thermometer, you can check for an internal temperature of 120°F for perfectly cooked shrimp.
Yes, you can freeze the breaded shrimp before frying. Just make sure to place them in a single layer on a baking sheet until frozen solid, then transfer them to a freezer bag. When ready to cook, fry them directly from frozen, adding a couple of extra minutes to the cooking time. However, it's best to enjoy the shrimp fresh for optimal texture and flavor.
Crispy Garlic Butter Shrimp pairs wonderfully with a variety of sides. Serve it over a bed of steamed rice or quinoa to soak up the delicious garlic butter. You can also complement it with a fresh salad or roasted vegetables for a balanced meal. For a more indulgent option, serve it with garlic bread to enjoy every drop of the sauce.
Leftover Crispy Garlic Butter Shrimp can be stored in an airtight container in the refrigerator for up to two days. Reheat in a skillet over low heat to keep the shrimp crispy. Avoid microwaving, as this can make them rubbery. For longer storage, consider freezing the uncooked, breaded shrimp as mentioned earlier.
You can easily adjust the spice level of this dish to suit your taste. If you prefer a milder flavor, simply reduce or omit the cayenne pepper. Alternatively, if you enjoy more heat, consider adding crushed red pepper flakes or a dash of hot sauce to the garlic butter sauce. Taste as you go to find the perfect balance for your palate.
The best way to reheat Crispy Garlic Butter Shrimp is in a skillet over medium-low heat. This method helps retain the crispy texture. Add a splash of water or broth to create steam, which keeps the shrimp moist without losing their crunch. Avoid the microwave, as it can make the shrimp tough and chewy.
Recipe Troubleshooting Guide
Too Dry
Problem: If your shrimp turn out too dry, it may be due to overcooking them. Shrimp cooks quickly and can become tough if left on the heat for too long.
Solution: To avoid this in the future, keep a close watch on the cooking time and remove the shrimp from the heat as soon as they turn pink and opaque. Consider marinating the shrimp beforehand for added moisture and flavor.
Not Crispy
Problem: If your shrimp aren't crispy, the oil may not have been hot enough during frying. This prevents the coating from searing properly.
Solution: Make sure to heat the oil until it reaches the right temperature before adding the shrimp. Additionally, avoid overcrowding the pan, which can lower the oil temperature and result in soggy shrimp.
Overcooked
Problem: Overcooked shrimp can become rubbery and tough, ruining the dish.
Prevention: To prevent this, keep a timer handy and check the shrimp frequently as they cook. Remove them from the heat as soon as they are opaque and springy to the touch.
Undercooked
Problem: Undercooked shrimp will appear translucent and may pose a food safety risk.
Recovery: Ensure you cook the shrimp until they are fully opaque and pink. If in doubt, use a meat thermometer to check for an internal temperature of 120°F.
Burnt
Problem: Burnt shrimp can occur if the oil is too hot or if they are left in the pan for too long.
Prevention: To prevent burning, keep the heat at medium to medium-high and watch the shrimp closely as they cook. If the oil starts to smoke, reduce the heat immediately.
Flavor Balance
Too Sweet: If your dish tastes too sweet, it might be due to an imbalance in seasoning or ingredients.
Too Salty: If it’s overly salty, consider reducing the salt used in the coating or sauce next time.
Bland: For bland shrimp, increase the amount of spices used or add a dash of lemon juice for brightness.
Key Ingredients
The main ingredient in this dish is, of course, the shrimp. Opt for large, fresh shrimp for the best flavor and texture. Frozen shrimp can also work; just make sure they are thoroughly thawed and dried before cooking. The quality of the shrimp significantly impacts the final dish, so choose wisely for a delightful experience.
Seasonings play a crucial role in enhancing the shrimp's natural flavor. The combination of garlic, paprika, and cayenne pepper adds depth and a hint of heat, making each bite a burst of flavor. Fresh parsley adds a pop of color and freshness, brightening up the rich garlic butter sauce. Together, these ingredients culminate in a mouthwatering dish that is sure to impress.
Essential Ingredient Notes
- Main Ingredient: Fresh shrimp are the star of this dish. Their sweet, delicate flavor pairs beautifully with the rich garlic butter. Choose shrimp that are firm and have a mild scent of the ocean. Avoid shrimp with a strong fishy odor, as this can indicate they are not fresh.
- Second Key Ingredient: Garlic is a must in this recipe for its pungent flavor. Freshly minced garlic provides the best taste, but you can use garlic powder in a pinch. The sautéing process releases the garlic's aromatic oils, creating a rich base for the sauce that enhances the shrimp.
- Essential Seasoning: Paprika gives a beautiful color and mild flavor to the shrimp. It also pairs well with the heat from cayenne pepper, which adds a kick without overwhelming the dish. Adjust these spices to your preference, as they can easily be modified to suit your taste.
Cooking Process
The cooking process for Crispy Garlic Butter Shrimp is straightforward yet rewarding. Start by preparing your shrimp and setting up the breading station to ensure an efficient cooking flow. Once the shrimp are coated, frying them in hot oil is essential for achieving that desired crunch. Make sure to fry them in small batches to maintain the oil temperature.
After frying, toss the shrimp in the garlic butter sauce, letting the flavors meld together. This final step allows the shrimp to absorb the rich, buttery sauce while maintaining their crispiness. Serve immediately for the best experience, and enjoy the burst of flavors in every bite.
Key Technique
The key technique in this recipe is the breading method. A three-step process—flour, egg, and breadcrumbs—ensures a crispy coating that locks in moisture. Using hot oil for frying is essential, as it creates a barrier that keeps the shrimp tender inside while achieving a crispy exterior. This technique not only enhances texture but also elevates the overall flavor of the dish.
Crispy Garlic Butter Shrimp
📋 Ingredients
Main Ingredients
- 1/2 cup unsalted butterfor the garlic sauce
- 6 cloves garlic, mincedadds flavor
- 1 teaspoon paprikafor color and flavor
- 1/2 teaspoon cayenne pepperfor a hint of heat
- 1 tablespoon lemon juicefor brightness
- 1/4 cup fresh parsley, choppedfor garnish
Sauce/Seasoning
- 1 lb large shrimp, peeled and deveinedthe main protein
- 1/2 cup all-purpose flourfor the coating
- 1 egg, beatento help the breadcrumbs stick
- 1/2 cup breadcrumbsfor a crispy texture
- Olive oil for fryingto achieve that perfect crisp
Instructions
Prepare the Shrimp
Start by rinsing the shrimp in cold water and patting them dry with paper towels. This step is crucial for achieving that crispy texture later on. Season the shrimp with salt, pepper, paprika, and cayenne pepper for a flavor boost.
Set Up Breading Station
In three separate bowls, set up your breading station. Place the flour in the first bowl, the beaten egg in the second, and the breadcrumbs mixed with a pinch of salt and pepper in the third. This will help create a deliciously crispy coating on the shrimp.
Bread the Shrimp
Dredge each shrimp in the flour, shaking off any excess. Then dip it into the egg, allowing the excess to drip off before finally coating it in the breadcrumb mixture. Make sure each shrimp is well-coated, as this will ensure a crispy result.
Heat the Oil
In a deep skillet or frying pan, heat about 1/2 inch of olive oil over medium-high heat. You want the oil to be hot enough that a breadcrumb dropped in will sizzle. This will give your shrimp that perfect crispy texture.
Fry the Shrimp
Carefully add the breaded shrimp to the hot oil in batches, making sure not to overcrowd the pan. Fry for about 2-3 minutes on each side or until golden brown and crispy. Use a slotted spoon to remove the shrimp and let them drain on a paper towel-lined plate.
Make the Garlic Butter
In a separate saucepan, melt the unsalted butter over medium heat. Add the minced garlic and sauté until fragrant, about 1 minute. Be careful not to burn the garlic, as it can turn bitter.
Combine Shrimp and Sauce
Once the garlic is fragrant, add the fried shrimp to the garlic butter mixture. Toss to coat the shrimp evenly in the garlic butter, then add the lemon juice and chopped parsley for freshness. Stir gently to combine everything.
Serve
Transfer the crispy garlic butter shrimp to a serving platter. Garnish with additional parsley and lemon wedges if desired. Serve immediately to enjoy the shrimp at their crispiest and most flavorful.
Recipe Notes & Tips
Storage Tips
To store leftover Crispy Garlic Butter Shrimp, place it in an airtight container in the refrigerator for up to two days. Reheat in a skillet over low heat to maintain crispiness. For longer storage, consider freezing the uncooked, breaded shrimp instead.
Serving Ideas
Serve Crispy Garlic Butter Shrimp over steamed rice, quinoa, or pasta for a satisfying meal. Pair it with a side salad or roasted vegetables to balance the richness. You can also enjoy it as an appetizer with cocktail sauce or lemon wedges.
Variations
Feel free to customize the recipe by adding your favorite spices or herbs. A dash of Old Bay seasoning can enhance the flavor profile. For a different twist, try incorporating lime juice and zest instead of lemon for a fresh, zesty taste.